Ever stared at that dusty, scratched-up dresser in the corner of your garage and thought, “I could make that beautiful”? Maybe you’ve even bought a can of paint, held the brush, and then… froze. It happens. We all get stuck between wanting something new and fearing we’ll ruin what we have. But here’s the truth: painting furniture isn’t rocket science. It’s messy, sure. It takes time. But it’s also one of the most rewarding DIY projects you can tackle. And in 2026, with better paints and easier tools than ever before, there’s never been a better moment to start.
You don’t need a workshop full of expensive gear. You don’t need years of experience. What you need is a little guidance, a lot of patience, and the willingness to make mistakes. Because guess what? You will make them. And that’s okay. In fact, those little imperfections are often what give handmade pieces their charm. This guide isn’t about perfection. It’s about progress. It’s about taking that old, forgotten piece and giving it a second life—and maybe finding a new hobby along the way.
Why Now Is the Perfect Time to Start
Let’s be real for a second. The world feels fast. Everything is digital, instant, and disposable. But there’s a quiet rebellion happening in homes across the globe. People are slowing down. They’re choosing to repair instead of replace. To create instead of consume. Painting furniture fits right into this shift. It’s sustainable. It’s personal. And honestly? It’s kind of therapeutic.
In 2026, the market for eco-friendly, low-VOC (volatile organic compound) paints has exploded. These aren’t just better for the planet—they’re better for you. No more headaches from strong fumes. No more waiting days for the smell to disappear. Modern chalk-style paints, milk paints, and water-based enamels dry quickly, stick well, and come in hundreds of colors. You can literally find a shade that matches your mood, your rug, or that one weird tile in your kitchen.
Plus, social media has changed the game. Ten years ago, you had to buy a whole book or take a weekend class to learn basic techniques. Today? There are thousands of free tutorials on YouTube, Instagram reels showing quick tips, and online communities where people share their wins and fails. You’re not alone in this. If you get stuck, someone else has probably been there too. And they’ll help you out. That sense of community makes starting less scary. You’ve got backup.
Gathering Your Tools Without Breaking the Bank
Here’s where most beginners trip up. They think they need every tool under the sun. Sandpaper grits from 80 to 400. Specialized brushes. Drop cloths. Tack cloths. Edge tape. The list goes on. But here’s a secret: you can start with almost nothing. Seriously. All you really need is a piece of furniture, some paint, a brush or roller, and a place to work.
That said, having a few key items makes the process smoother. Let’s break it down. First, sandpaper. You don’t need a whole box. Just grab a medium grit (around 120-150) and a fine grit (220). Use the medium one to rough up shiny surfaces so the paint sticks. Use the fine one to smooth things out between coats. Next, brushes. Synthetic bristle brushes work great for water-based paints. Get a couple of sizes—a 2-inch flat brush for big areas and a smaller angled brush for corners and details. Cheap ones are fine to start. You can upgrade later.
Don’t forget cleaning supplies. A degreaser like TSP (trisodium phosphate) or even just warm soapy water works wonders. Dust and grease are the enemies of good paint adhesion. Wipe everything down before you start. Oh, and drop cloths. Old sheets or cardboard work perfectly. You don’t need fancy plastic ones. The goal here is to keep your floor clean, not to impress anyone. Keep it simple. Save your money for good paint. That’s where it counts.
Prepping Like a Pro (Even If You’re Not One)
Prep work is boring. I know. It’s not glamorous. No one posts pictures of themselves sanding on Instagram. But here’s the thing: prep is 80% of the job. Skip it, and your paint will chip, peel, or look blotchy. Do it right, and your piece will look like it came from a boutique shop. So let’s talk about how to do it without losing your mind.
Start by removing hardware. Take off knobs, pulls, hinges—everything. Put them in a baggie so you don’t lose them. Next, clean the piece thoroughly. Use that degreaser or soapy water mentioned earlier. Let it dry completely. Then, sand. You don’t need to strip the piece down to bare wood unless it’s heavily varnished or damaged. Just scuff up the surface. Think of it like giving the paint something to hold onto. Wipe away the dust with a damp cloth or tack cloth.
Now, here’s a pro tip: if your piece has deep scratches or dents, fill them with wood filler. Let it dry, sand it smooth, and move on. If you’re painting over a dark color with a light one, consider using a primer. It saves you from applying five coats of paint. But if you’re going dark-to-dark or using a high-quality paint with built-in primer, you might skip this step. Every piece is different. Trust your eyes. If it looks uneven, add another coat of prep. If it looks good, you’re ready to paint.
Choosing the Right Paint for Your Project
Walk into any hardware store in 2026, and you’ll be overwhelmed. Chalk paint. Milk paint. Latex. Acrylic. Enamel. Mineral paint. What does it all mean? Let’s simplify. Chalk paint is popular because it requires minimal prep and gives a matte, vintage look. It’s forgiving for beginners. Milk paint is eco-friendly and creates a unique, aged finish, but it can be trickier to work with. Latex and acrylic paints are durable and easy to clean up, making them great for high-traffic pieces like tables or chairs.
For most beginners, I recommend starting with a water-based chalk-style paint or a high-quality latex enamel. They’re user-friendly, dry quickly, and don’t stink up your house. Brands like Fusion Mineral Paint, Dixie Belle, and even Behr’s cabinet line have gotten really good in recent years. Look for paints labeled “self-leveling” or “one-coat coverage.” They save time and frustration.
Color choice matters too. Don’t just pick what’s trendy. Pick what you love. Neutral tones like whites, grays, and beiges are safe and versatile. Bold colors like navy, emerald, or mustard can make a statement. If you’re nervous, test a small area first. Paint a drawer front or the back of a chair. See how it looks in your lighting. Remember, you can always repaint. There’s no permanent mistake here. Just keep experimenting until it feels right.
Applying Paint Without Losing Your Mind
Okay, you’ve prepped. You’ve picked your paint. Now comes the fun part: actually painting. But wait—don’t just dip and slap. There’s a method to the madness. Start by stirring your paint well. Not shaking. Stirring. Shaking creates bubbles. Use a stir stick or even an old spoon. Pour a small amount into a separate container. Don’t dip your brush directly into the main can. You’ll contaminate it with dust and dried bits.
Apply thin coats. This is crucial. Thick coats drip, sag, and take forever to dry. Use long, smooth strokes in one direction. Don’t overwork the paint. Let it sit. If you see drips, gently smooth them out with your brush. After the first coat dries (check the can for timing, usually 1-2 hours), lightly sand with fine-grit sandpaper. Wipe away the dust. Then apply the second coat. Most pieces need two to three coats for full coverage.
Here’s a trick for smooth results: use a foam roller for flat surfaces like table tops or cabinet doors. It leaves fewer brush marks. Use a brush for edges and details. And if you do get brush marks? Don’t panic. Lightly sand them out between coats. Or embrace them. Some texture adds character. It’s your piece. You decide what “perfect” looks like. Just take your time. Rushing leads to mistakes. Slow down. Breathe. Enjoy the process.
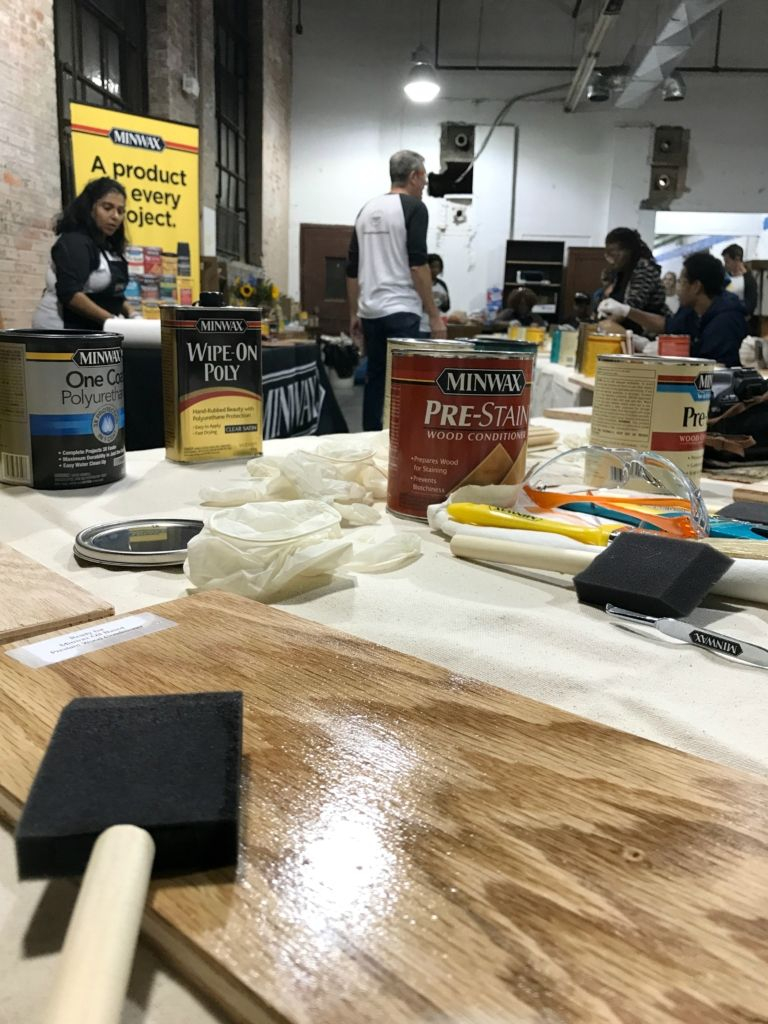
You’ve painted. It’s dry. You’re almost done. But don’t stop yet. The final step—sealing—is what protects your hard work. Without a sealer, paint can scratch, stain, or wear off quickly. For chalk paint, use a clear wax or polyurethane. Wax gives a soft, matte finish but needs reapplication every year or so. Polyurethane is tougher and lasts longer. For latex or enamel paints, a water-based polycrylic works well. It’s clear, non-yellowing, and easy to clean up.
Apply the sealer with a clean brush or foam applicator. Thin coats again. Let it dry completely. Then, reattach your hardware. If your old knobs look tired, consider replacing them. New hardware can totally change the look of a piece. Brass, black matte, ceramic—there are endless options. Or, clean and polish your old ones. Sometimes, a little elbow grease is all they need.
Finally, step back. Look at what you’ve done. Maybe it’s not flawless. Maybe there’s a tiny drip you missed. That’s fine. It’s handmade. It’s yours. Place it in your home. Use it. Love it. And when friends ask, “Did you buy that?” you can smile and say, “Nope. I made it.” That feeling? That’s worth more than any perfect finish.
Painting furniture isn’t just about changing a color. It’s about reclaiming creativity. It’s about seeing potential in the overlooked. In 2026, with better materials and more support than ever, there’s no barrier to entry. Just start. Grab that old chair. Buy that can of paint. Make a mess. Learn as you go. And remember: confidence doesn’t come from knowing everything. It comes from doing something, even when you’re unsure. So go ahead. Pick up that brush. Your next favorite piece is waiting.