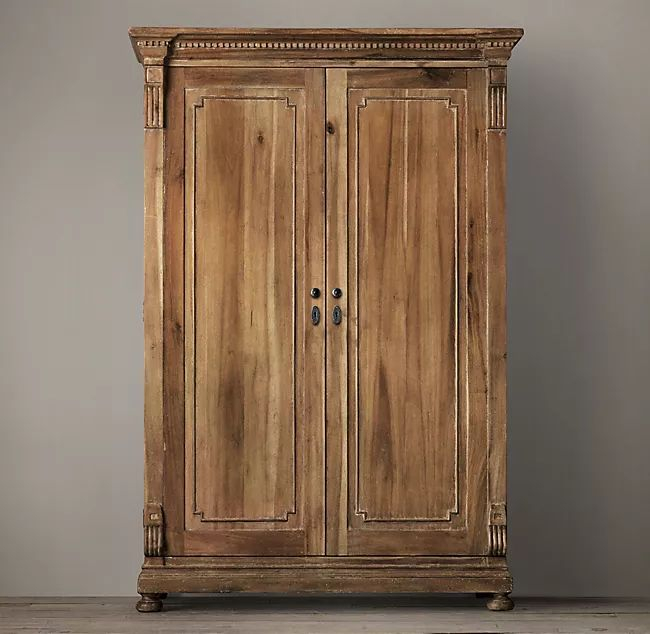
The raw scent of old lacquer, turpentine, and half a century of accumulated attic dust hits you the moment you slide open the sticky bottom drawer of a neglected dresser. Standing in the dim light of an estate sale basement or a dusty garage, it is easy to dismiss these heavy, dark-stained wooden monoliths as relics of a bygone era. They feel cumbersome, dated, and completely out of step with modern minimalist interiors. Yet beneath the scratched polyurethane, the water rings, and the loose veneer lies a dense framework of old-growth mahogany, quarter-sawn oak, or solid walnut—timbers that modern mass-market furniture manufacturers simply cannot replicate at any reasonable price point.
We live in a disposable economy characterized by flat-pack particle board and synthetic veneers that buckle at the first sign of humidity. Against this backdrop, rescuing a forgotten dresser is a quiet act of rebellion. It is an intentional choice to reject planned obsolescence in favor of material integrity and historical continuity. When you drag a tired 1930s art deco piece or a mid-century walnut chest of drawers into your workspace, you are not merely undertaking a weekend DIY project. You are entering into a dialogue with the original craftsman, uncovering the choices they made decades ago, and adapting their work to serve a new chapter in your home’s story.
Transforming these unloved case pieces requires more than a casual coat of trendy chalk paint. True restoration demands patience, a respect for structural physics, and an understanding of how wood responds to environmental stress over generations. Whether you are dealing with a structurally sound heirloom passed down through family lines or a thrift store rescue missing its hardware, the process of bringing a dresser back to life offers deep creative satisfaction. By approaching each restoration with a blend of preservation ethics and practical craftsmanship, you can elevate a discarded brown box into a breathtaking anchor piece for your living space.
The Anatomy of Aging Wood and Structural Assessment
Before applying a single drop of chemical stripper or picking up a sander, you must read the story written across the surfaces of the dresser. Wood is a hygroscopic material, meaning it constantly absorbs and releases moisture from the surrounding air based on seasonal humidity shifts. This continuous movement causes older furniture to warp, shrink, and expand over decades. Ignoring these structural realities can ruin a restoration project before it even begins. You need to inspect the joinery, check the alignment of the drawer frames, and evaluate the integrity of the secondary woods used for the drawer interiors and back panels.
Many vintage dressers, particularly those manufactured during the mid-20th century, utilize core panels of stable plywood or softwood faced with thin, decorative wood veneers. Veneer blistering and lifting are common issues caused by failing animal glues or moisture exposure over decades. Pressing down on these bubbled areas will often reveal a hollow sound. If you try to aggressively sand over lifted veneer, you will instantly burn through the paper-thin wood layer, exposing the ugly core beneath. Identifying these fragile zones early allows you to inject specialized wood glue beneath the lifting veneer and clamp it flat before any abrasive work starts.
Drawer glides and runner systems also demand close scrutiny. Older dressers frequently lack modern metal ball-bearing slides, relying instead on solid wood center guides or side runners that have worn down from friction over generations. When wood rubs against wood for eighty years, grooves form, causing drawers to sag, stick, or tilt dangerously when pulled. Assessing these mechanical wear points dictates whether you will need to wax the runners, build up worn tracks with thin shims, or plane down swollen drawer sides that refuse to glide smoothly in high-humidity months.
Environmental history leaves distinct chemical signatures on old furniture surfaces as well. Nicotine stains, decades of greasy furniture polish buildup containing silicone, and water-damaged varnish will all interfere with the adhesion of new finishes. If you attempt to stain over silicone residue without thoroughly scrubbing it away with mineral spirits or specialized degreasers, your fresh finish will fisheye, bead up, and look disastrous. Taking the time to diagnose the chemical and physical condition of the dresser ensures that your labor yields a durable, professional result rather than a frustrating mess.
Stripping Away the Decades Without Harming the Substrate
The moment of truth in any dresser restoration arrives when you strip away the old, oxidized finish to reveal the raw grain beneath. Novice restorers often make the fatal mistake of grabbing coarse-grit sandpaper and grinding away at the surface, which inevitably destroys delicate molded edges, rounds over sharp corners, and sands completely through valuable wood veneer. Professional restorers instead rely on chemical strippers or controlled scraping to remove the heavy lifting of old lacquer, shellac, or varnish, reserving abrasives strictly for final smoothing.
Modern chemical strippers come in various formulations, ranging from traditional methylene chloride gels to safer, citrus- or soy-based alternatives. While eco-friendly strippers produce fewer harsh fumes and are pleasant to work with indoors, they often require significantly more dwell time to break down tough, catalyzed factory finishes from the mid-to-late twentieth century. Applying a generous, thick coat of stripper with a natural-bristle brush and covering it with plastic wrap prevents the active solvents from evaporating too quickly, allowing them to bite deep into multiple layers of old coating.
Once the old finish bubbles and transforms into a sludgy paste, you must scrape it away gently using plastic putty knives or brass scrapers that will not gouge the soft underlying hardwood. Steel wool soaked in mineral spirits or denatured alcohol helps scrub out stubborn residue trapped within carved details, fluted columns, and hard-to-reach panel grooves. For shellac-based finishes common on antique pieces from the Victorian era or earlier, denatured alcohol alone will dissolve the finish completely without requiring harsh chemical strippers, melting the old resin back into a liquid state that wipes away effortlessly.
After the chemical stripping phase, neutralizing the wood is an essential step that many DIY guides overlook. Water-based strippers or residual alkaline chemicals can react poorly with new wood stains, causing discoloration or preventing clear coats from curing properly. Washing down the stripped dresser with a 50/50 mixture of water and vinegar or mineral spirits neutralizes the surface chemistry. Once the wood dries thoroughly, you can finally assess the true color of the grain, identify any lingering dark water rings that require oxalic acid bleaching, and prepare for the sanding stage.
Step-by-Step Practical Implementation Guide for Refinishing
Executing a flawless dresser makeover requires a methodical, step-by-step approach where rushing any single phase compromises the entire project. Follow this proven field-tested methodology to guide your dresser from tired relic to stunning statement piece.
- Step 1 (Surface Preparation and Hardware Removal): Remove all existing drawer pulls, escutcheons, and hinges, storing them safely in labeled bags. Vacuum out the interior cavities of the dresser case and inspect all joints, gluing and clamping any loose structural framing before touching the exterior surfaces.
- Step 2 (Stripping and Chemical Cleaning): Apply your chosen chemical finish remover systematically, working in manageable sections like a single drawer front or side panel at a time. Scrape away softened varnish residue carefully, then scrub the bare wood with mineral spirits and fine bronze wool to lift out embedded dirt from the grain pores.
- Step 3 (Precision Sanding and Defect Repair): Once the wood is completely dry, sand the surfaces progressively using a random orbital sander on flat areas and hand-sanding blocks for curves. Begin with 120-grit paper to remove minor blemishes, move to 150-grit, and finish with 180- or 220-grit for a glass-smooth touch. Fill any deep gouges or missing wood chunks with tinted epoxy wood filler that matches the surrounding timber.
- Step 4 (Staining, Conditioning, or Painting): Decide whether to highlight the natural wood grain or apply a sophisticated painted finish. If staining, apply a pre-stain wood conditioner first to prevent blotchiness, especially on soft hardwoods like maple or cherry. Wipe your gel stain or pigment stain evenly across the grain, letting it sit before buffing off the excess. For a two-tone look—such as a deep navy or charcoal body paired with a warm chocolate-stained wood top—mask off sections cleanly with painter’s tape and apply high-adhesion furniture enamel using a fine-foam roller or HVLP spray system.
- Step 5 (Protective Topcoating and Hardware Reinstallation): Lock in your finish by applying multiple thin coats of a durable protective topcoat. Wipe-on polyurethane, hardwax oils like Rubio Monocoat, or traditional sprayed lacquer offer excellent protection against daily wear. Lightly hand-sand with 400-grit sandpaper between coats to knock down microscopic dust nibs. Finally, polish your original hardware with metal cleaner or install new pulls that complement the updated aesthetic before sliding the restored drawers back into place.
Common Pitfalls and Field-Tested Workarounds
Even experienced woodworkers occasionally run into frustrating obstacles when restoring vintage furniture. Anticipating these common traps saves hours of rework and prevents permanent damage to valuable antique pieces.
- Pitfall 1 (Sandthrough on Thin Veneer): Aggressive sanding easily burns straight through thin decorative wood veneers, revealing pale, unsightly core wood. Workaround: Always check edge profiles with your fingertips before sanding, avoid using power sanders near sharp corners or edges, and hand-sand those vulnerable zones cautiously with a backing block.
- Pitfall 2 (Stain Blotchiness on Soft or Figured Woods): Woods like cherry, pine, and maple absorb stain unevenly, resulting in dark, muddy patches and zebra-like streaks. Workaround: Never skip applying a solvent- or water-based pre-stain wood conditioner, which temporarily seals the wood pores so pigment absorbs uniformly across the entire panel.
- Pitfall 3 (Sticky, Uncured Finishes Due to Humidity): Applying polyurethane or oil-based finishes in damp, cold, or poorly ventilated basements stops the chemical curing process, leaving surfaces tacky for weeks. Workaround: Maintain an ambient workshop temperature between 65°F and 75°F with relative humidity below 50 percent, and use circulating fans to move fresh air gently across the drying furniture.
- Pitfall 4 (Seizing Drawers Due to Seasonal Swelling): Restored drawers that slid smoothly in your dry garage suddenly jam tight once brought inside a climate-controlled home. Workaround: Plane or sand a fraction of a millimeter off the bottom edges and side panels of the drawer boxes during dry winter months, and coat all sliding contact points with paraffin wax or beeswax instead of wet lubricants that attract dust.
- Pitfall 5 (Bleed-Through of Old Tannins or Wood Stains): Dark reddish or yellowish tannins from woods like oak and mahogany bleed straight through white or light-colored chalk paint jobs, creating ugly yellow halos. Workaround: Always apply two coats of an oil-based or shellac-based pigmented primer (such as Zinsser B-I-N) to seal the wood fibers completely before applying your topcoat color.
The Intersection of Historical Preservation and Modern Interior Design
Restoring a forgotten dresser is rarely just about historical replication; it is equally about making a vintage object function seamlessly within contemporary living spaces. Interior design trends constantly shift, yet high-quality wooden furniture possesses an inherent architectural neutrality that allows it to bridge generational gaps. When you pair a classic mid-century silhouette or an ornate Victorian chest with modern hardware, minimalist lighting, and neutral textiles, you create a layered, collected interior that feels deeply personal rather than catalog-standard.
Purists often argue that altering an antique piece by painting it constitutes a form of historical vandalism. However, reality dictates a more nuanced perspective. If a dresser has already been heavily damaged, poorly repaired in the past with mismatched wood patches, or constructed from unremarkable secondary hardwoods hidden beneath decades of opaque brown lacquer, stripping it down to bare wood for a natural look is simply not viable. In these instances, applying a sophisticated, modern paint finish—such as deep forest greens, muted clays, or dramatic navies—brings dignity back to a piece that would otherwise end up in a landfill.
Furthermore, thoughtful restoration allows you to upgrade the hidden ergonomics of old furniture. Modernizing a dresser often involves installing discreet felt pads inside drawer tracks to eliminate rattling, reinforcing the back panel with screws instead of flimsy rusted tacks, or upgrading the internal framing to support the weight of modern electronics and storage needs. By blending old-world craftsmanship with modern functional enhancements, you create a hybrid object that honors the past while performing reliably in the present.
The economic and environmental dimensions of this work are equally compelling. Manufacturing new solid-wood furniture demands intensive resource extraction, energy-heavy processing, and long-distance global shipping logistics. By rescuing a pre-owned dresser from an attic, thrift store, or curbside pickup, you participate in a circular economy that shrinks your household carbon footprint. The carbon stored within the old-growth timber remains locked away in your furniture, while your home gains a functional centerpiece built with a level of structural honesty that is increasingly rare in modern commerce.
Strategic Recommendations for Your Next Restoration Project
Approaching furniture restoration with a strategic mindset ensures your time and investment yield maximum aesthetic and functional returns. Use this practical framework to evaluate and execute your next vintage project successfully.
- Evaluate Core Integrity Over Surface Flaws: Never judge a dresser by its ugly surface finish. Look past peeling veneer, bad paint jobs, and missing knobs to assess the solidness of the frame, the thickness of the wood panels, and the quality of the joinery (such as traditional dovetail or mortise-and-tenon joints).
- Invest in Professional-Grade Supplies: Cheap chemical strippers, low-quality brushes, and bargain sandpaper will only cause frustration and ruin your results. Spend money on sharp scrapers, high-grade abrasives, reputable finishes, and proper personal protective equipment including organic vapor respirators and nitrile gloves.
- Respect the Pacing of the Process: Wood finishing cannot be rushed. Allow adequate drying times between stripping, sanding, conditioning, staining, and topcoating. Trapping moisture or solvent beneath a fast-applied topcoat leads to cloudy finishes, blushing, or long-term peeling.
- Document Every Stage for Future Maintenance: Take high-resolution photographs before, during, and after your restoration. Knowing the exact products, grit levels, and stain formulations you used makes future touch-ups or maintenance simple if the piece receives a heavy scratch down the road.
Standing back to admire a fully restored dresser—its drawers sliding open with a whisper-quiet glide, its wood grain glowing with deep, chatoyant warmth under a hand-rubbed finish—offers a distinct kind of fulfillment. In a culture that conditions us to consume rapidly and discard mindfully, reclaiming an abandoned piece of furniture anchors us to tangible reality. It reminds us that objects can hold memory, absorb care, and endure far beyond the fleeting trends of any single decade.
The work you invest into stripping away old paint, repairing broken joinery, and polishing weathered brass hardware ripples outward, transforming the atmosphere of your entire room. That old dresser is no longer a forgotten casualty of someone else’s attic cleanout; it is a vital, living artifact restored to usefulness. As you place your belongings into its freshly cleaned drawers, you realize that true luxury isn’t found in buying something brand new—it is found in bringing history back to life with your own hands.